Thursday, 10 March 2011

Fahionaires Gothica Photo 3 before and after

Here we are on our 3rd image for Gothicka fashionaires. 


BEFORE AND AFTER

This time I will post the before and after and see if you notice many changes in the two images.


Ok, where to start with this image when I open it up in photoshop the first thing I did was clean up the dirty sensor spots, One of the most frustrating things for me, I must get my camera cleaned twice a month, as I hate those little dirty brown spots. 
2). The palm tree, Radio antennae
3). The airconditioning unit up front to the right
4) Models skin and eyes, lipstick
5) flag pole
6) the concrete up front, just removed the distractions.


1) Used the clone tool to clean up the sensor spots
2) used the quick selector tool to select the palm tree and antennae and picked a clone spot that matched the colors an slowly filled it in. Some of the gate edges weren't as clean when I finished so I picked up the history brush and went over the gate to bring back the original data. A great tool .
3) The air conditioning unit was a little trickier, first I quick selected the area, then made a new layer picked up the concrete beside it and cloned it into place. I wanted to keep the texture but the color tones were too light. So I then went back to the original layer and picked up the brush tool at a soft 100 put the brush on darken, picked up a darker tone and painted the area so it would blend and still have the texture. Then went to the second layer and lowered the opacity.
4) Skin eyes and lipstick, the skin I cleaned with the clone brush, then used Mama Shans plug in (snow white buff) and lowered the opacity to 30 %. Highlighted the eyes with the dodge tool.
made a new layer, brush tool ~ set to darken picked up the black in the lipstick and painted the lips to fill them in. Then lowered the opacity on the layer till it was natural looking. 
5)Flag pole. Love the new clone tool is CS 5. It is great for Cloning these type of objects.
I picked up the area just and the tip of the building moved up a bit and cloned in an upward stroke to lengthen the flag pole. I liked the shape of the gate leading you into the image. I felt with the flagpole at the highest peak, it brings the viewers eyes around comfortable. Setting on the models face. 
6) The concrete up front and the tin work under the models arm needed a bit of cleaning with the clone tool. 
And a sharpen layer. When I sharpen I prefer not to sharpen the whole image. When its a portrait. 
Usually I make a new layer, then go to sharpen ~ Unsharp  mask  adjust till you get it the way you like it. Click on mask then mac CNTL i to reverse the mask, so now you don't see any sharpening effect at all then, and your mask layer will be black, with white on the top layer paint the areas you want sharpened. In this image, I wanted the hair, gate, concrete, and the tower in the back sharp, but not the models skin. 

When you look at these two images side by side it is very hard to notice the difference in the two photos, but the final image is so much better with the slight adjustments as the first. 


EQUIPMENT USED

Tuesday, 8 March 2011

FASHIONAIRES GOTHIC photo 2 BEFORE AND AFTER

"My challange for this image was to ghost my model to really give a gothic, ghostly image. It took a few tries and 4 seconds with the shutter open was enough to move the model into the two positions and manually flash at each spot."


Original image


4 seconds the shutter was open for to capture this image
my aperture was at f20, I needed to get out as much light as I could.
While the shutter was open, Ross my lighting assistant flashed the nikon sb-800  manually, once then the model moved then flashed it again! This is all done on one frame in Camera.
It can be a little tricky but with a digital camera you can keep working on it till you get it right. 
On the original image there wasn't much I didn't like about it, as the concept for Gothica worked.
Cleaned up the model skin a little bit.  
I can see the exit sign in the back ground and a push here on the door.  
So those I burned out. 
I then cleaned up a few shiny spots on the wood that I found distracting.
cropped it, then I went into filter~ lens correction~ custom~vertical correction~ +21 to correct for the slant in the window frames. 
These windows are lit by the natural sunlight that was drenching the room with way to much ambient light.  Hence the reason for such a high f stop. I really needed the 4 seconds to move the model into the two positions to get this ghost type effect. 
other ways of darkening the room would have been to use a filer 2 or 4. ND. 
This would have given me the same time value with less aperture.... But whatever, it worked. 


Finished image

Thanks to Hannah Kent Model
Ross Martin for being the flasher
Payal  and Erin from Fashionaires Middle East for organizing the day,
Camelot for allowing us to use there location.
Layers for all the accessories.
                                                        Side by side   very subtle differences

And the Eiffel tower, not sure who provided that, but it is a purse, only two in the world supposedly, and guess who has the other one?

Monday, 7 March 2011

FASHIOAIRES GOTHIC Photo 1 BEFORE AND AFTER

In this series of Fashionaires - gothica I am going to lay out the before editing photos and after effects as well as the settings that were used in the photos. 
Original image

1/800th at 6.3
using a NIkon D3 with two Nikon SB-800 strobes. 
I used a fast shutter speed because the ambient light value in the restaurant was bright and cheerful and didn't work with the theme of what we were doing so speeding up your shutter speed controls the ambient light.... Little clue there for people that want to put that into there photo bag.

Things I liked about the image
1). the pose of the model
2).the look on her face
3).the lens flare
4).the overall composition
5).the ambient light coming from the light above the models head. 


 things I don't like about it:    
 1). overall to dark 
 2) increase the red tones.
3). hair in the face.
4) the reflection on the leg
5). Move the light fixture down so it was closer to the model
6). wanted to put light in the skull to the left
7) crop it
8) dirty sensor spot by the light

Final Image

The first thing I did was open it in Light room and increase the red tones and lift the over all exposure to where the light value was better on the models face.
I then brought it into photoshop. copied the layer and zoomed in and cleaned up the hair on the models face using the clone and healing brush as well as a plug in that I purchased from Mama Shans site.
She has a portrait packet that she sells that saves hours in skin cleaning. I find many programs over work the skin and this software works really well, and you can go as heavy or as light as you want, as it is worked on in a separate layer. In the portrait pack she sells it has many skin tones, lip glosses you name it she has it. They all work very well. She has many tutorials on YOUTUBE  as well. 

I used my soft 100 brush on lighten to clean up the whites of the eyes. Again don't go to far, as it can look really over processed.
I then cleaned the spots on the legs with clone 
Then used the select tool and traced around the light copied and pasted where I wanted it. Many ways to do that, but that was the quickest for me, then took a soft eraser tool and lessened the opacity of the eraser and took the hard lines away to blend the wall.
Then I selected the light from the fixture on the wall with the selection tool and copied and pasted it, moved it down ontop of the skull. Control T on mac with allow you to rotate and warp the selection. 
 I zoomed in and erased the light on the skull area where there shouldn't be light. This was a new layer so I lowered the opacity till the light value was good.
then flattened all the layers. 
Made a new layer ~ filter~ sharpen~ unsharpen~ make a mask~ control i to reverse then paint back what part of the image I wanted sharpened. 
I hope in this blog I was able to explain a little of the photoshop tools that I use. 
Is there any tools you would like to more about? Or any of this process you would like in more detail?
In this photo series I have at least 6 more images that we will go through step by step. 

If you have any questions regarding this blog don't hesitate to leave a comment. 


Mondanite 1st fashion photo shoot in Bahrain!


ABS DRESSES


Publication 
Mondanite magazine


It all started when I received a call from the Fares at Mondanite magazine, they were trying to revamp their monthly issue and add some extra inserts in their magazine.  He wanted to know if I would be interested in shooting a new fashion section for his magazine. I was thrilled with the idea. It was a  Valentines issue for February,  shoot date had too be two weeks before press date, so mid January was the goal.
We had meetings, discussed concepts then when it came down to the final weekend. I went to the           Al Moyaed Towers to Mondanite head quarters.Was decided that since this was there first fashion edition maybe we should photograph this outside with buildings of Bahrain in the distant.
Standing on the 11th floor of Al Moyand Tower and looking down the Seef area, I had commented it would be great if we knew someone that lived in one of the buildings below us, and how surprised I was when Fares said he lived at the Landmark. So there was our location, a little roof top with Mondonite office in the background.


Well the next two days it rained.  I was starting to panic and think maybe we should do a studio shoot, then on the eveining of, I thought lets photograph this is the rain, why not, will get some extra umberellas, started thinking about lighting, purchasing some large clear bags, maybe some dry cleaning bags would work. Somehow, I needed to protect all the gear from getting soaked. Hmm.. this will work, and look very different at the same time.

Woke up 6:00 the next morning and the sun was shinning. Couldn't beleive my luck, how much easier this was going to be not having to package and protect all the gear.... Yeah sunshine.... will have to put the rain shoot on hold.
Packed the car, generator, lights, stands, cables, triggers, lens, no plastic bags! Off we go the Landmark building in Seef. .
Armand, came  and helped with the lighting and off to work we went.
The haze was in and out through the morning, so our light values were changing dramatically from image to image.  I used the sun mostly for  side lighting and back lighting and filled the shadow side of the model with a silver  or gold reflector.


Thanks to Tabea our beautiful model,
Sarah from Mondanite for her input
Fares for giving me the opportunity
Armand for the light help.
All in all a great day!


Fashionaires fashion Circus.

FASHIONAIRES
Fashion Circus. 
When the days of fashion in Bahrain were new and a little crazy.
This was such a fun shoot.
The theme of the shoot was fashion Circus, brought to you by Fashionares a London based fashion organization. 

The day started out a little challenging to say the least, frustrating might even be a better word. All the models, photographers, make up artists, hair stylists show up early in the morning at Dana Mall to get to the restaurant where we had permission from the restaurant manager to use as the venue when we arrived security of the mall didn't allow us in and knew nothing of our arrival, calling the gentleman whom owned the mall, he had no more to say then "no one asked me" and that was that, we were not allowed in. Luckily Edward Smith was with us made a few phone calls and a few hours later we were at our new location smiling. What a venue it was, the inside of the restaurant was bursting with color and couldn't have been better. 
There was lots of activities going on, girls trying on clothes, make up being applied, hair being puffed. 
The fun had began as I set up my Alien bees lights. 
Two with soft boxes, one as a spot on the wall when needed. 
My first shot of the day was with Danielle and Charlie as they sat on the chair waiting to get started. I was checking out my lighting and there was the shot. One of my favorites of the day. It was so quirky how they were both dressed, (or not) and the look on Danielle's face. Slightly tipped to the side as if she had a question.  Great model, lots of fun to work with. Charlie always fit, that's what happens when your a fitness trainer I guess. 


We played around and created
a couple more fun shots.

Danielle's hair was so weirdly placed with all that hairspray we started playing around with the idea of wind blowing it. 
Hence these two images, the one with the orange background was actually manipulated in photo shop, the color of the back ground and the tassels being blown. 

This photo I took a few series off and placed one layer on top of the other in photo shop and put her in the mirror, gave a great sense of depth to the photo.


Beautiful Gemma our Irish model. Now living in Dubai.... We miss you! 


This Model Hannah Kent (daughter) is 14 at the time this photo was taken, it was definitely a dress up day for her, one of her first jobs modeling I think she did a fabulous job! The Yellow and red checkered walls were very theatrical and really worked for the circus theme, that with a top hat and a leopard print dresses and voila. a pretty cool photo. The Hair and make up for Hannah was done by Wael from Pacci Lucci.


This shot of Miranda Kent (daughter as well) aged 16 at the time was having a great time in the boxes in the wall's and the colors were just so vivid with the silver tights. 
Her hair and Make up was also done by Wael at Pacci Lucci. 

For the following photo we took it with her back down and I flipped it in photoshop!
This was her creative idea, I think it worked quite well. 


This image of Miranda was taken toward the end of the day and we were feeling a little tired. I asked her to give me a pouty look and then I digitally imposed the diamond shape on her eye. No reason, other than I thought it needed something else. 


Sophie was the queen of hearts that day, her with a whip, look out... You will recognize Sophie in some of my other work, with Elie and Jean Hair salon. 

Hannah Climbed into the boxes with the nice window light coming in from behind. The lighting for htis was pretty simple just one soft box on to fill the shadows. 


Sultan was an absolute doll that day, waited around, helped out and flexed his abs when needed. 
looking very fit here Sultan. I have worked with Sultan on different projects and he is always willing to try anything.  Oh yes and as you can see the glass has been changed in photoshop. I added the three colors just because I like it. 


Unfortunately I didn't get to work with all the models at this shoot, but there were many photographers there shooting and creating there own images. 
The group shot at the end of the day. 


These images were published in Ohlala magazine.
Hope you like the selection of photos from the day. We had a great time
Big thanks to Erin any Payal for organizing the event and for Monsoon restaurant for putting up with all of our crazy antics... 


If you have any questions or want to follow my blog feel free to add as a follower. I have another Fashionaires shoot I will blog about this week GOTHICA very cool strobist work. 
Cheers everyone! 

Saturday, 19 February 2011

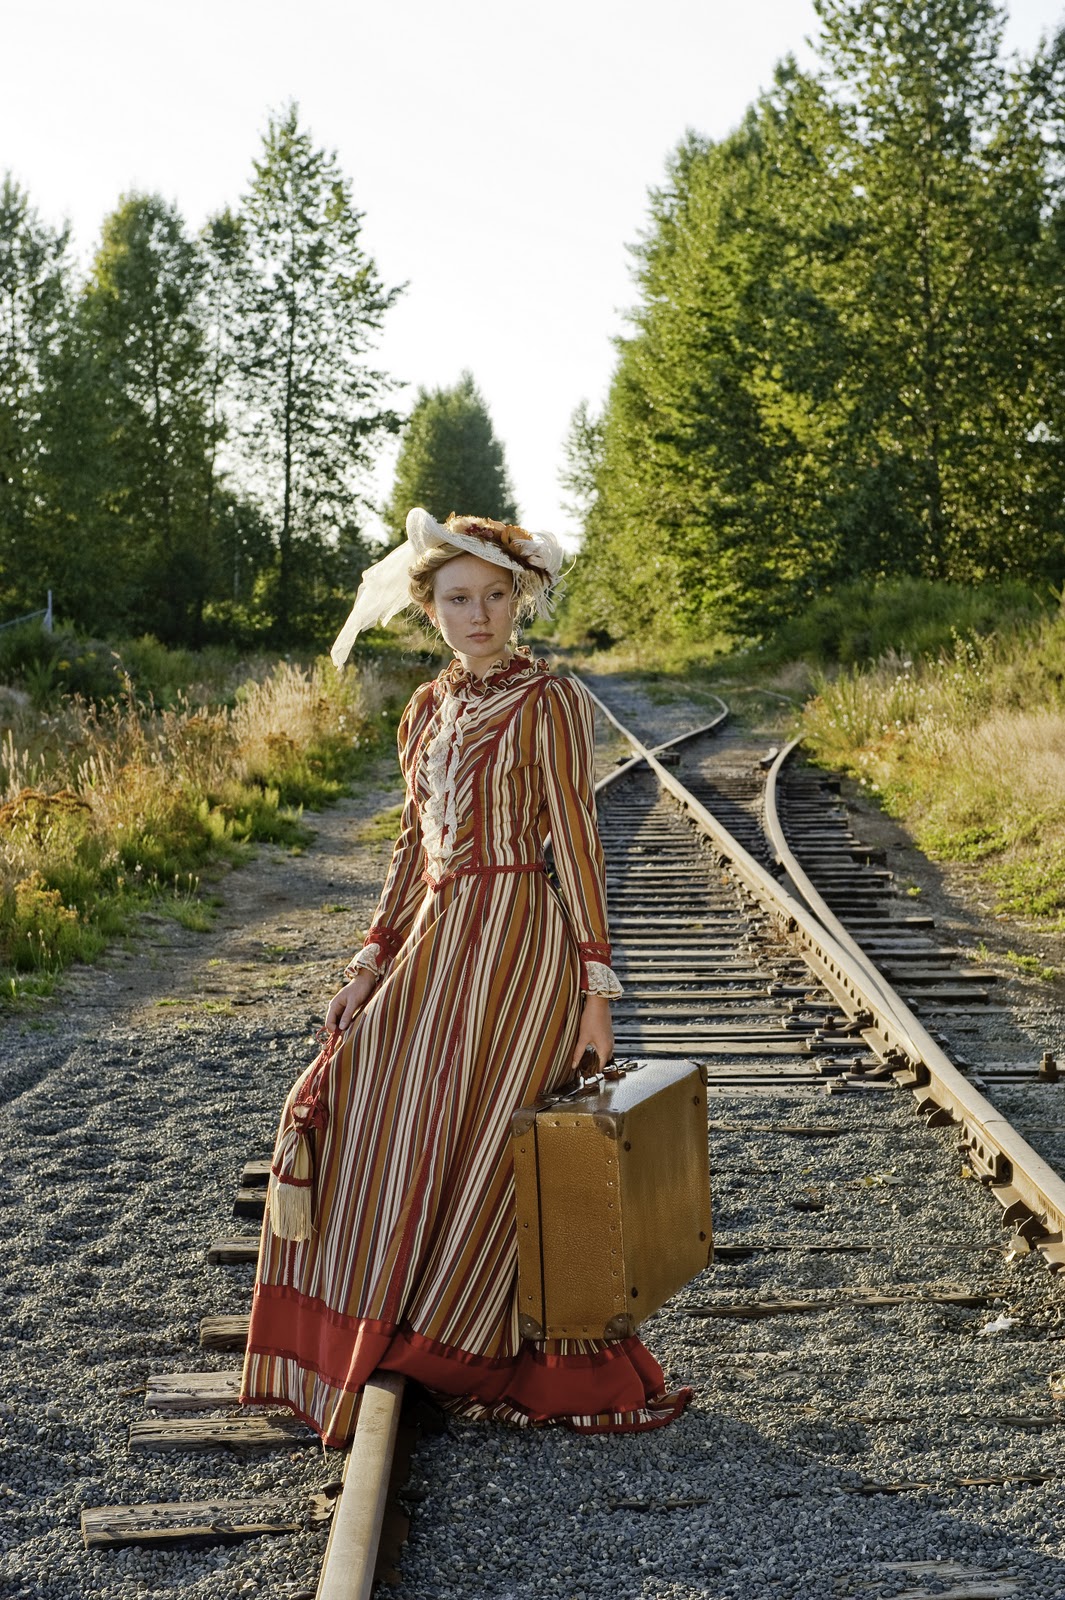
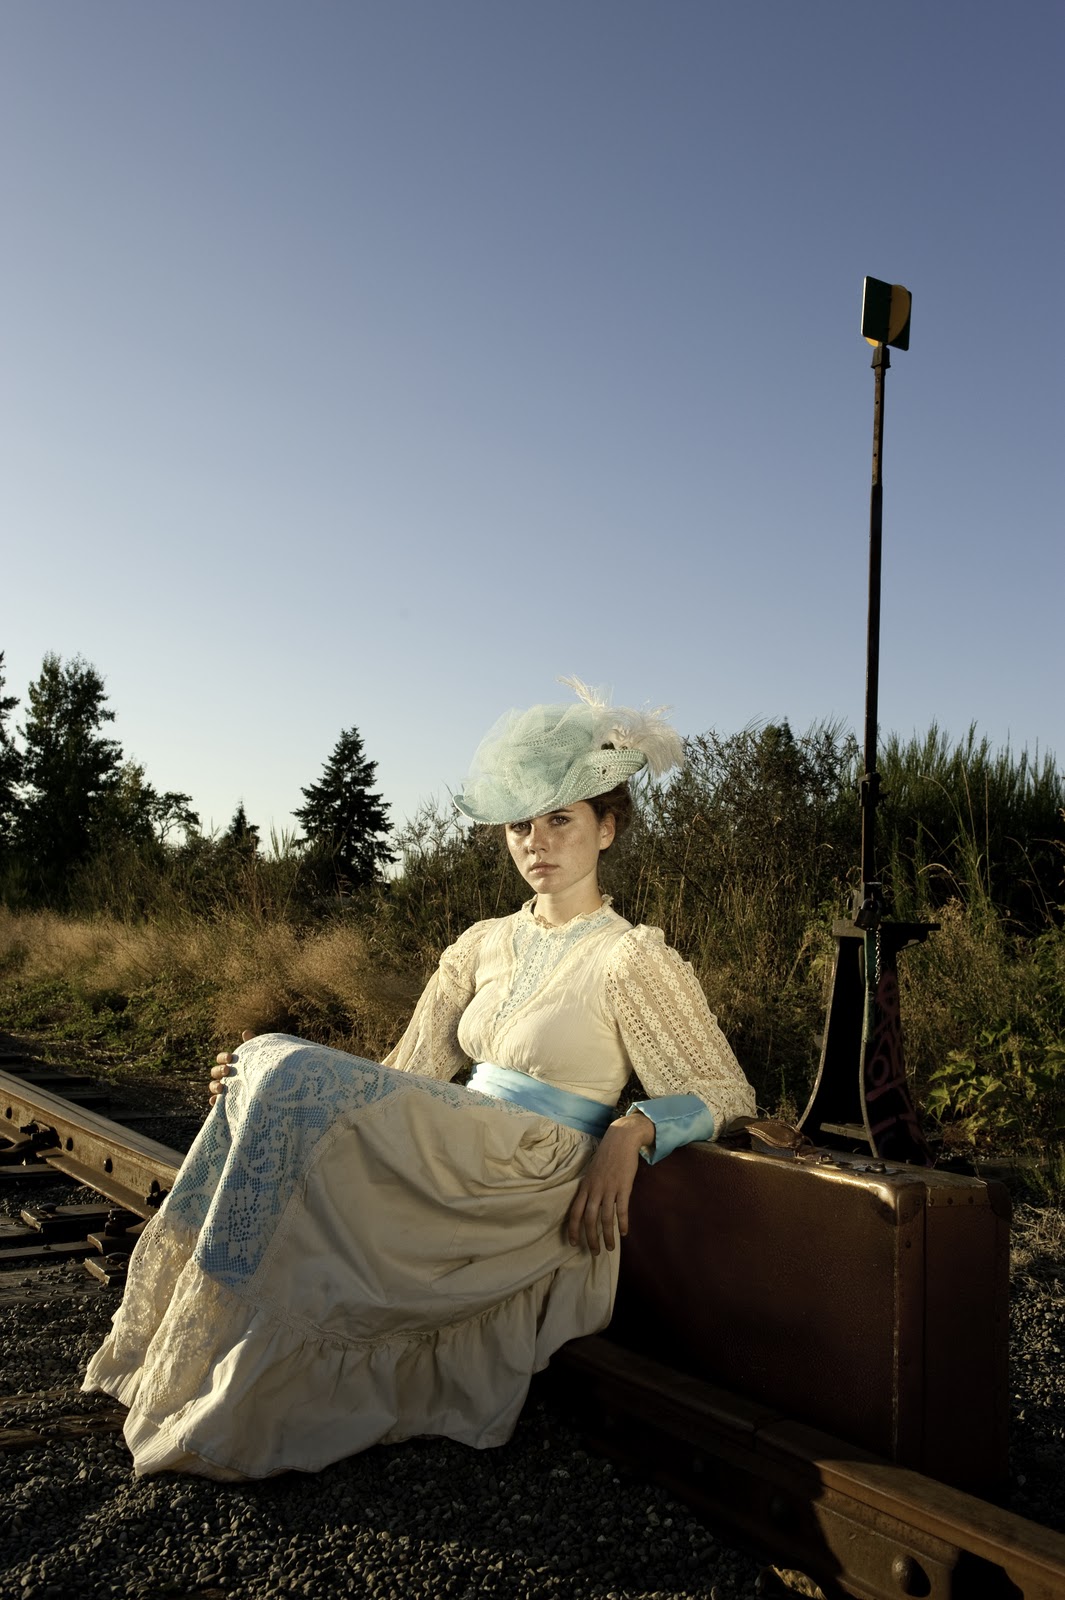
Courtenay, B.C. Railway personal shoot


 Courtenay Costume Rental's
Personal project
Photography shoot


For a few years now I have wanted to do a shoot with a heritage feel to it. I have been snooping through second hand shops to find vintage props, without much success.
Last summer I decided to drop into Courtenay Costumes on Puntledge road to see what they had for possible props.

And Wow what a selection, we snooped through the dresses, hats, belts scarfs, jewelry suit cases, you name it they have it.
What a selection. We decided on vintage white dress and a vintage pattern dress for each one of the models. 
It was a beautiful sunny day, we were camping at Comox lake that week, the girls grabbed their little bit of make up hair pins, clips and accessories that they thought they might need and off we went to the railway station. 

Models: Gabby Lindsay
Hannah Kent
Miranda Kent


1/640's of a second. I wanted the buildings to be in focus, crisp clean and sharp with detail. The f-stop I was using f/16. ISO at the lowest possible setting which with a D3 is Low 1.0


It was about 3:00 when we started. Lots of sunlight, you can see by the hard shadows in the first photo the sun was mid sky as the shadows are relatively long and hard. 


I decided to take the girls to the shader side of the station so I could use different lighting techniques. 
in this next photo of the girls on the stairs,


I first set my camera setting to expose for the sky. I wanted the blue contrast against the red of the building. Then  it was time to light the girls. 
 I turned on my SB 800's two of them set at 1/4 power.  
One of the flashes was pointing at the model on the top rail which was shot through a shoot through umbrella, the other flash was pointing at the lower model direct (no diffusion) 
as I only had one umbrella with me. (traveling)
You can see the shadows on the skirt of the lower model, without diffusion you get hard shadows.
 
                 There was no sun at all on this side of the building.                  All lit by two off camera flashes. I triggered them using an Su-800. 


You can see the hard shadows behind Hannah, and the rim lighting on her hands.


This photo I placed one sb-800 to the models left side of her, it was placed up on the rail, I wanted a highlight on the far side of her face to give more dimension to the photo. Using the rail in the composition to lead the eye to the model. 


These two photos were backlit by the sun, the front of her I lit with one sb-800 and a silver reflector. You can see the highlight in the models eye on the 2nd photo, with out the highlight you wouldn't have much life in the models face.


Back to the sunny side of the station!

For this photo, we used the vintage umbrella to defuse the light, no hard shadows. Leading lines  from the train tracks to add dimension to the photo. 


This photo was shot without any fill light no flash, no reflectors!


This photo I used a silver reflector, you can see the difference in the lighting in her face. 


This photo of Gabby I metered the camera with the in camera's metering system, using the spot meter mode in her face,  and took the shot.  Since the camera was metering from her face the background is over lit. Still works, just sets a different feeling in the image then the one below.  


This shot was taken with in a minute of the last photo. I wanted to post this so you could see how the different metering systems can help you get the different moods in your photos.
First what i di was meter for the ambient light. I used the same f stop as the last shot f 16 and then used a little fill light, on the model. For that shot, I flashed my sb-800 into the gold side of the reflector so I would reflect a larger source of light. The sky is bluer and the over all feel is different. 


Playing with shadows, spot meter from the skin.


Hannah and her suit case!


The last 3 images I shot with the sun as the back and side light. Using one flash and a reflector to fill the  light on the darker side. 
In the last image you can see two light sources in Hannah's eye's, a small shadow just under chin. 
Quite often if you are wondering how a photo was lit, you can break it down by looking at the direction of shadows, highlights in the eyes, rim lighting ect... there are many clues, in most photos, just take the time to look at them. 


For this shot the same as above, but I wanted to have the sun setting in the background. I cheated and created it with a lens flare in Photoshop in layers. The girls wanted to go back to the lake for an afternoon swim...
This shoot took us about 3 hours, I have lots more good photos from the shoot, but I posted the best ones, so I could explain the set up and ideas. 
Equipment used

Nikon 24-70 mm lens, very nice piece of glass 2.8 aperture. Love this lens


Nikon SB-800 Wish Nikon was still making them., they now have the 900 very bulky and the new sb700. Looks very similar the 800. Has good reviews, except the battery door not as strong as people would like.
 I haven't purchased one yet, still looking to buy more sb 800's on ebay. 


Lastolite 5 in one reflector


Lastolite shoot through umbrella
Nikon D3. Love it Still no need to upgrade. This is one incredible camera, 
Su 800. Great tool for adjusting your flashes from the camera, and triggering, as long as they are in close range.
If you have any questions, just send me an email through my website or leave a comment on the blog.
Follow if you would like,  soon I will be posting a blog for Bahrain Top model season 3, episode 3....
We have had our challenges this month!